Key Takeaways
Miscalculating UV exposure times can throw a serious wrench in your workflow and lead to defects in your products. To avoid mistakes and keep clients happy, accurate measurements are absolutely essential.
Over-curing products often results in brittleness and cracking, wasting materials and necessitating costly callbacks. Managing exposure time effectively is crucial for maintaining both quality and profits.
Neglecting maintenance routines can seriously harm your UV curing gear, leading to inconsistent quality in your products. Regular care is key to avoiding expensive mistakes and ensuring dependable performance.
Picking the wrong UV lamp can jeopardize the quality and efficiency of the curing process because each lamp operates at a specific wavelength designed for different applications. Ensuring compatibility with your materials is fundamental for achieving the best results.
Surface preparation plays a pivotal role in ensuring good adhesion and preventing delamination. When you skip proper surface prep, it can result in product failures and higher return rates.
Keeping a detailed record of exposure times and maintenance can reveal trends that help improve future projects. Documenting your processes is vital for streamlining workflows.
Spending time to understand lamp specifications and the needs of your equipment can save you from costly oversights and enhance project results. Thorough research is necessary when it comes to selecting the right tools and materials.
Miscalculating UV Exposure Times Can Wreck Your Workflow
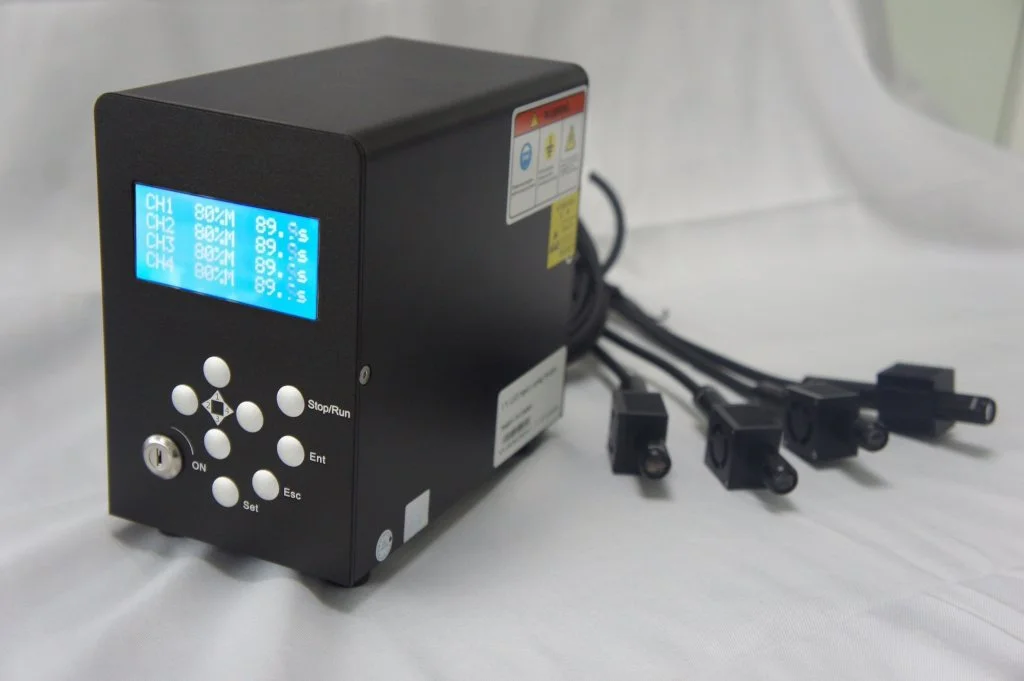
There’s nothing that can derail a project faster than miscalculating UV exposure times. I can’t even count how many late nights I’ve spent fixing blends that just wouldn’t stick because of someone over-curing or under-curing a product. With deadlines breathing down my neck, I found myself scrambling to address an obvious oversight—came from a rushed measurement, of course. Sound familiar? It’s a scenario we’ve all faced at some point. The reality is, it’s not only about having top-notch equipment; it’s about using it wisely.
The Hidden Costs of Over-Curing
Honestly, over-curing looks harmless initially, but it hits your bottom line hard. It can result in brittleness, cracking, or even peeling away from its substrate. And those kinds of mistakes? They lead to wasted materials and infuriated clients who expect nothing less than perfection.
Think about it: why invest in high-performance uv spot curing systems if you’re not using them to their full potential? I definitely learned this the hard way. One time, every single card in my run came back with noticeable defects. My client was furious, and I had to absorb the costs myself. The stress was overwhelming. Always double-check your exposure times. It may save you more than just cash.
Identifying the Sweet Spot: Timing Tips for Pros
Everyone has their own idea of the sweet spot, but discovering where it lies can be quite challenging. Here are a few tips I’ve gathered over the years:
- Begin with the manufacturer’s guidelines, but don’t stop there. Make adjustments based on your findings.
- Run small test batches—think of these as beta tests for your specific settings.
- Keep a comprehensive log of your times and results. You’ll spot patterns that can help in future projects.
Though it might seem monotonous, getting the exposure times right can really boost your output. Trust me; those minor adjustments can yield significant rewards in the long run.
Ignoring Maintenance Protocols: A Recipe for Disaster
Now, let’s dive into another major blunder: overlooking maintenance. Seriously, it’s like ignoring that pesky engine light on your car. You’ll end up stuck sooner or later. Just ask any seasoned technician. I remember neglecting a consistent maintenance schedule in my early days, and it nearly cost me a vital client due to a faulty lamp that I could’ve replaced well ahead of the deadline.
The Real Impact of Neglecting Your Equipment
Here’s the hard truth: regular maintenance is crucial for your UV spot curing system’s performance. Burnt-out lamps? Clogged optics? They lead to unreliable results. In quality control, inconsistent outcomes are unacceptable. I learned that neglecting your machines often results in rejected products. The ripple effect spreads quickly—leading to poor quality throughout your project. Before you know it, you’re tossing profits out the window.
The cost of ignoring maintenance far outweighs the effort of keeping your equipment in shape.
Proven Maintenance Practices You Can’t Skip
So, how can you ensure your equipment runs smoothly? Here are some practices I’d recommend:
- Set up a regular cleaning schedule—dust and debris can take a toll on your machinery.
- Periodically check your lamp strength. Dimming often goes unnoticed until it’s too late.
- Document your maintenance efforts to spot performance trends over time.
Don’t endanger your hard work. Invest the time to keep your equipment in excellent condition, and you’ll enjoy the benefits of superior output.
Choosing the Wrong UV Lamp: A Critical Error
Picking the wrong lamp is like buying a high-end sports car and skimping on premium fuel. I can’t tell you how many times I’ve seen techs haphazardly select lamps, thinking they’re all the same. Spoiler alert: they really aren’t. The right lamp choice impacts your curing quality, lifespan, and energy efficiency.
How Lamp Selection Affects Curing Quality
This is where it gets intriguing. Each lamp has a unique wavelength. If you select one that doesn’t align with your resin or paint, you end up with a subpar cure. I learned this the hard way when an entire production run fell apart due to a mismatched lamp. Who knew? It’s not just about brightness; it’s all about compatibility.
Take a moment to consider the lamp’s spectral output. Is it suited to your specific application? Here’s what I suggest:
- Thoroughly research your options.
- Look at technical data sheets and user reviews.
- Don’t hesitate to contact manufacturers directly for some insights.
Your lamp selection can make or break your workflow. Don’t take it lightly.
Strategies for Choosing the Right Type and Manufacturer
Figuring out the right type and manufacturer is like piecing together a puzzle. But it’s manageable. Start with these strategies:
- Understand your application needs—do you need low, mid, or high pressure?
- Review product lifespan expectations; sometimes, opting for a cheaper version means multiple replacements.
- Account for availability for quick replacements and customer support.
Take this from someone who’s been around: investing your time in considering all this will save you from headaches later on. Ensure everything matches your project requirements.
Underestimating the Importance of Surface Preparation
This next point is one you can’t overlook: surface preparation is paramount. It might seem like a minor detail, yet its impact is massive. I’ve seen too many people dive straight into curing without prepping the surface properly, only to discover their projects don’t hold up. It’s a bit like trying to affix a post-it note to a greasy wall.
The Overlooked Step That Can Sabotage Your Results
I totally understand—deadlines can force everyone into a rush. But shoddy surface preparation is a recipe for disaster. You end up dealing with poor adhesion, leading to delamination. Picture this: you ship a product, only to have clients send it back because it didn’t meet their standards. Totally preventable. The cost of overlooking surface prep usually far exceeds the time spent doing it correctly.
Keep this in mind: good surface prep is as crucial as the curing process itself. You might have top-notch gear, but if you skimp on the basics, what’s the point?
Best Practices for Ensuring Optimal Adhesion
So, what can you do to get it right? Here are some best practices I’ve learned:
- Thoroughly clean surfaces to eliminate all contaminants.
- Select appropriate primers that enhance adhesion.
- If necessary, roughen surfaces to improve bonding.
The bottom line? Quality prep sets the stage for everything that follows. Don’t underestimate its importance.
FAQ
What are common signs that my UV curing equipment needs maintenance?
If you’re spotting inconsistent curing results, fluctuating lamp brightness, or unusual noises coming from your gear, those are definitely red flags. Seriously, don’t wait until the machine breaks down; being proactive saves you money in the long run.
Can I use any UV lamp for all curing applications?
Absolutely not. Every UV lamp has a specific wavelength designed for particular materials. Using the wrong lamp could lead to incomplete curing. Trust me, I’ve dealt with that nightmare when production quality tanked.
How do I know the right UV exposure time for my projects?
Figuring out the right exposure time often involves a bit of trial and error. Begin with the manufacturer’s guidelines, run small tests, and meticulously record what works. Finding your sweet spot is all about some experimenting.
What materials are typically compatible with UV curing?
You’ll find that UV curing does wonders on a variety of materials like plastics, glass, and even some metals. But remember, compatibility is key. Don’t just assume—it’s crucial to do your homework to avoid significant quality issues.
What are the consequences of skipping surface preparation?
Neglecting surface preparation typically leads to poor adhesion, ultimately causing project failures. I can’t emphasize this enough: a clean, well-prepared surface is your staunch ally for successful curing. Otherwise, you’re just setting yourself up for problems.
Are there any industry standards for UV curing processes?
Yes, various industry standards exist, but they can differ based on sector and application. Check organizations like ASTM or ISO for guidelines that are specifically relevant to your field. Following these standards could save you from a ton of trouble later on.
How often should I replace my UV lamps?
It really depends on usage frequency, but a good rule of thumb is to replace lamps once they show signs of dimming or at least every 1,000 hours of operation. A burnt-out lamp can compromise your entire workflow—so don’t wait until it’s too late!
What is the role of documentation in the UV curing process?
Keeping detailed logs allows you to identify trends over time. You’ll notice patterns that help you refine processes, reduce errors, and boost output quality. Seriously, don’t neglect this—it’ll make your life much easier.
Useful Resources
- ASTM International– Offers standards related to materials testing and UV curing processes.
- International Organization for Standardization (ISO)– Provides international standards, including those relevant to UV curing technologies.
- UV-Cure.com– A resource focusing on UV curing technology, best practices, and insights from the industry.
- The Adhesion Society– A treasure trove of information on adhesion, including vital surface preparation techniques for UV curing.
- The American Coatings Association– Offers resources related to coatings and curing processes, including information on UV technology.
- UV Technology– Provides details on UV lamps, curing systems, and their various applications.
- National Academies Press– Features publications covering various engineering topics, including materials and curing technologies.
- University of West Florida – Center for Advancing the Teaching of Technology and Science– Delivers educational resources in technology and engineering domains.
Comments are closed.